Docker & Eclipse
- Install Docker Tooling in Eclipse
- Docker Perspective and View
- Pull an Image
- Run a Container
- Build an Image
Docker and Eclipse
This chapter will show you basic Docker tooling with Eclipse:
- Pull/Push/Build Docker images
- Run/Start/Stop/Kill Docker containers
- Customize views
Install Docker Tooling in Eclipse
Downlaod Eclipse for Java Developer and Install.
Go to “Help” menu, “Install New Software...”.
Select Eclipse update site for the release, search for Docker, select “Docker Tooling”.
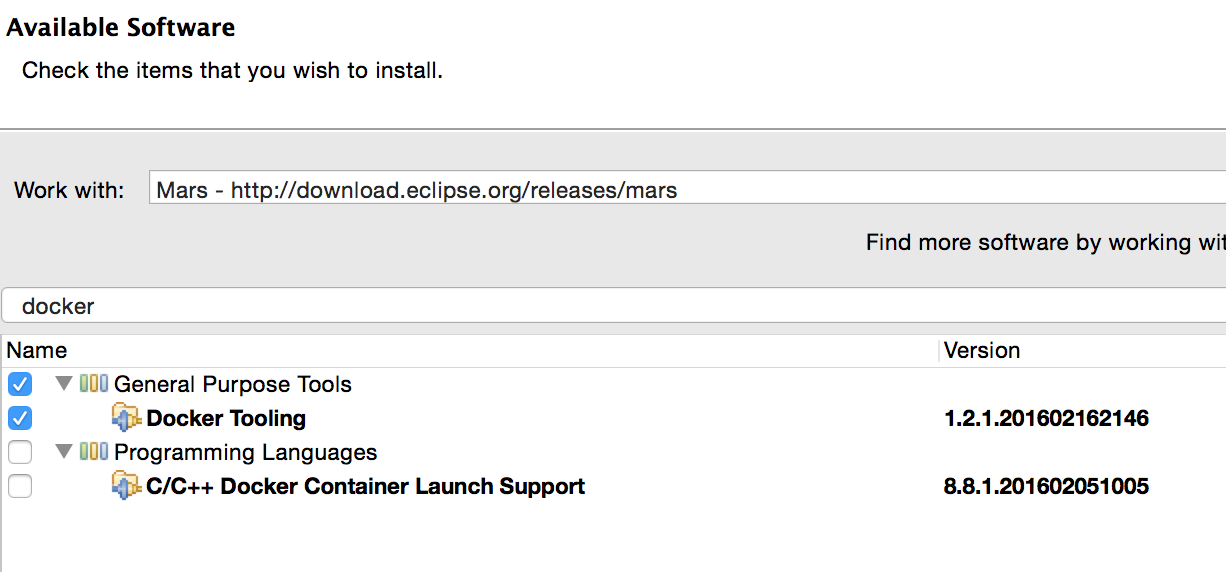
Click on “Next>”, “Next>”, accept the license agreement, click on “Finish” to start the installation.
Restart Eclipse for the installation to complete.
Docker Perspective and View
Go to “Window”, “Perspective”, “Open Perspective”, “Other...”, “Docker Tooling”.
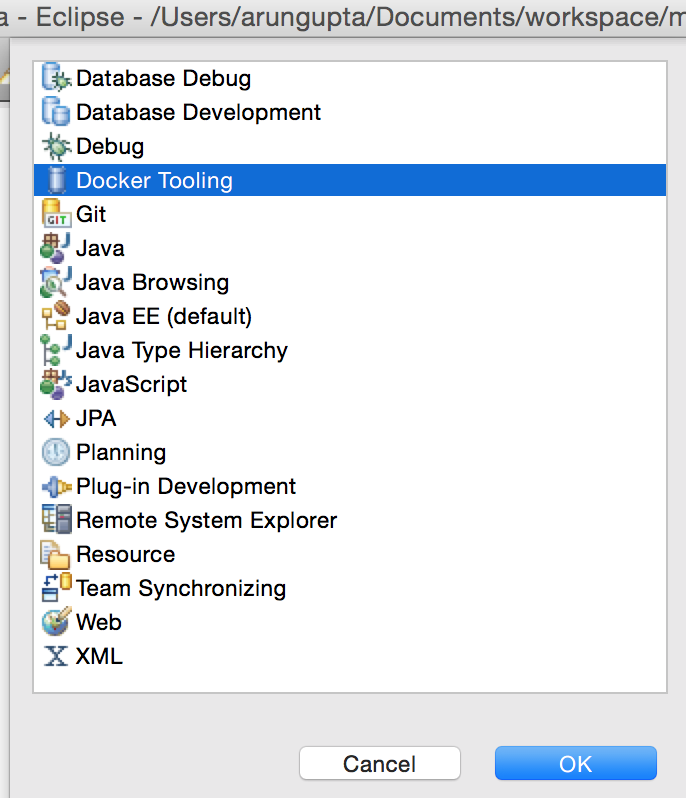
Click on “OK” to see the perspective.
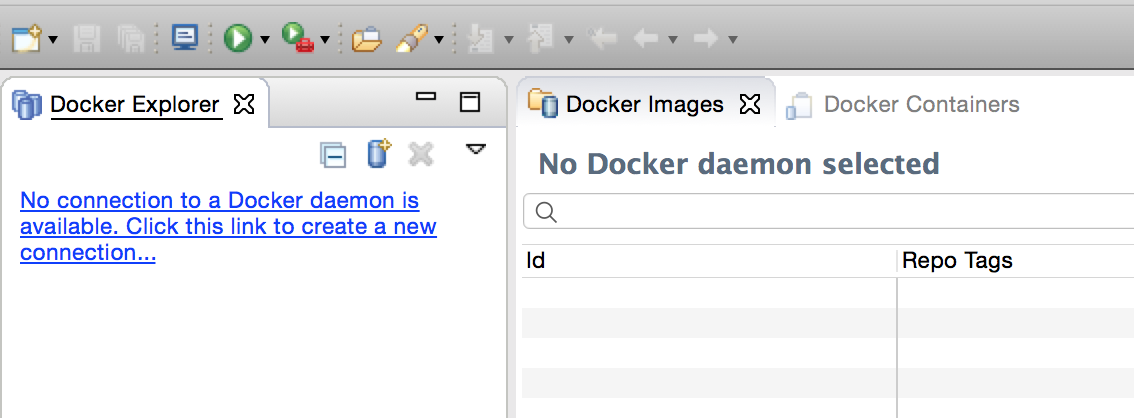
This has three views:
- Docker Explorer: a tree view listing all connected Docker instances, with image and containers.
- Docker Images: a table view listing containers for selected Docker connection.
- Docker Containers: a table view listing containers for selected Docker connection
Click on the text in Docker Explorer to create a new connection. If you are on Mac/Windows, you are likely using Docker for Mac/Windows or Docker Toolbox to setup Docker Host. Eclipse allows to configure Docker Engine using both Docker for Mac/Windows and Docker Toolbox.
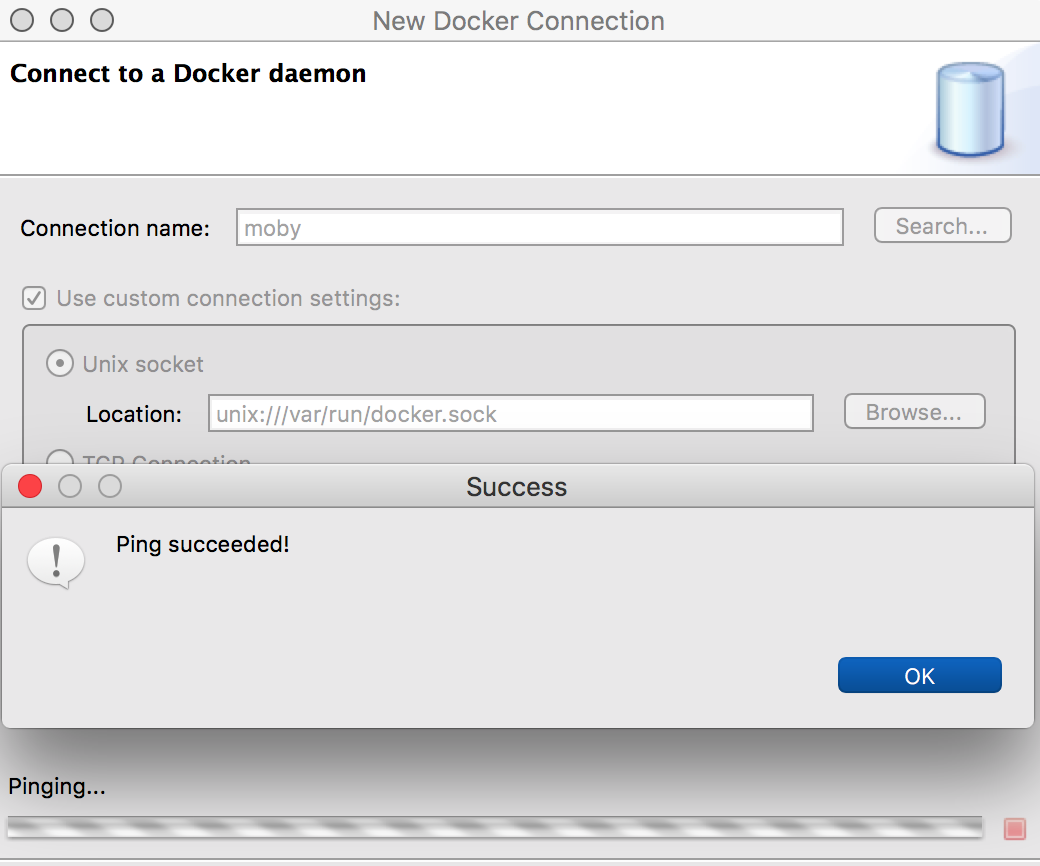
If you are using Docker for Mac/Windows, then the default values are shown:
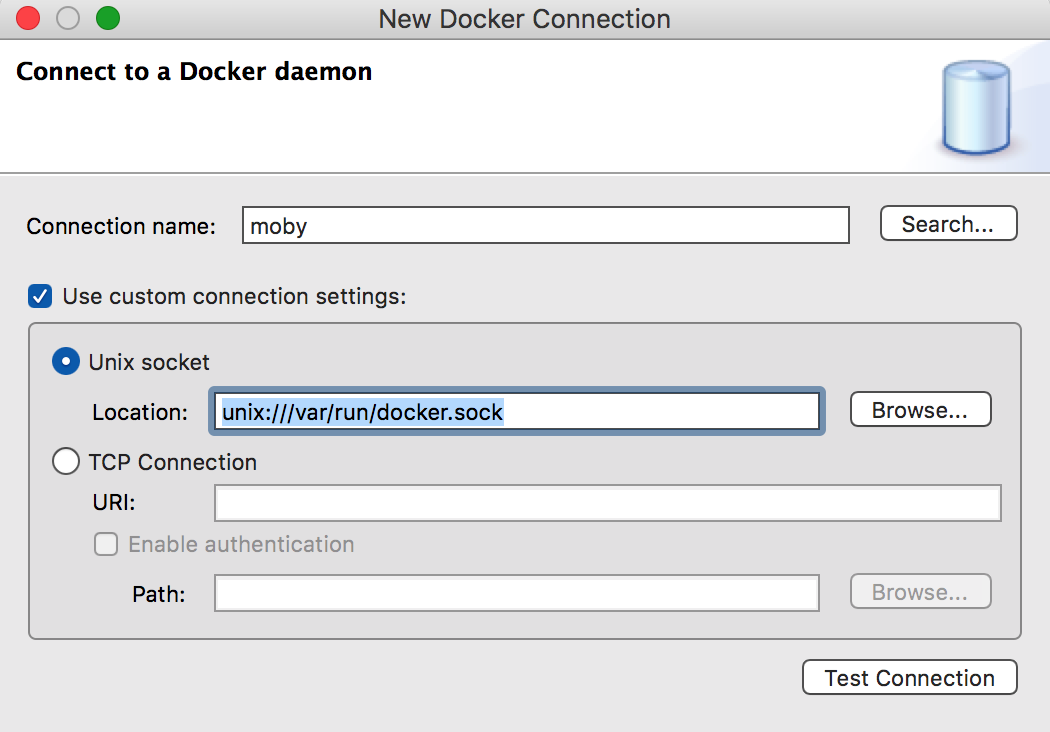
Click on “Test Connection” to test the connection.
If you are using Toolbox, enter the values as shown:
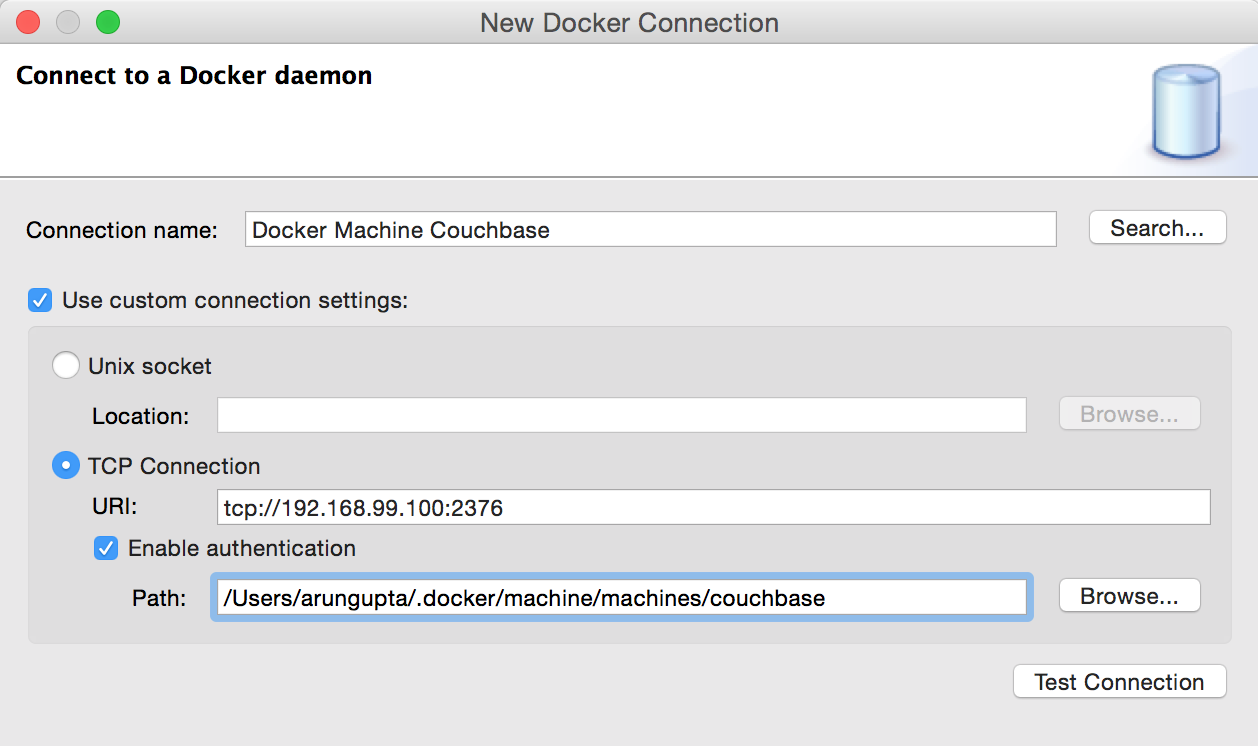
The exact value of TCP Connection can be found using docker-machine ls command. The path for authentication is the directory name where certificates for your Docker Machine, couchbase in this case, are stored.
Click on “Test Connection” to make sure the connection is successfully configured.
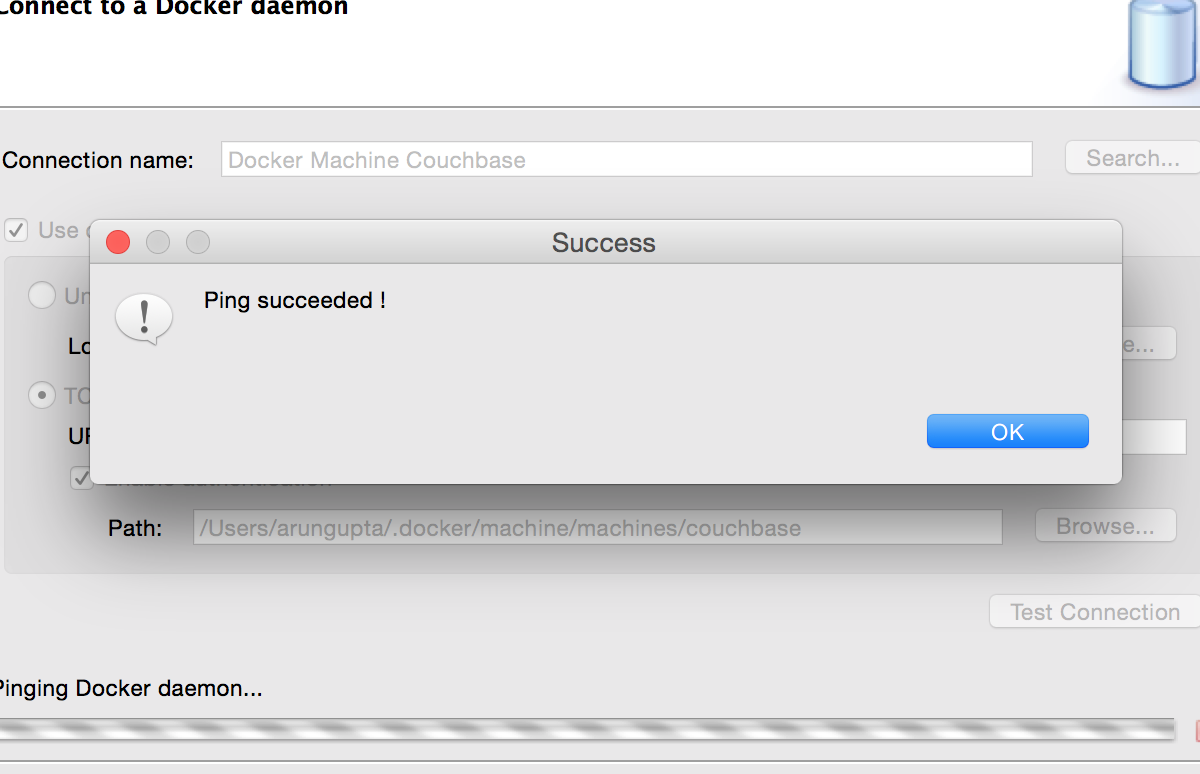
In either case, the configuration can be completed once the connection is tested. Click on “Finish” to complete the configuration.
Docker Explorer is updated to show the connection.
Containers and Images configured for the Docker Machine are shown in tabs. They can be expanded to see the list in Explorer itself.
Pull an Image
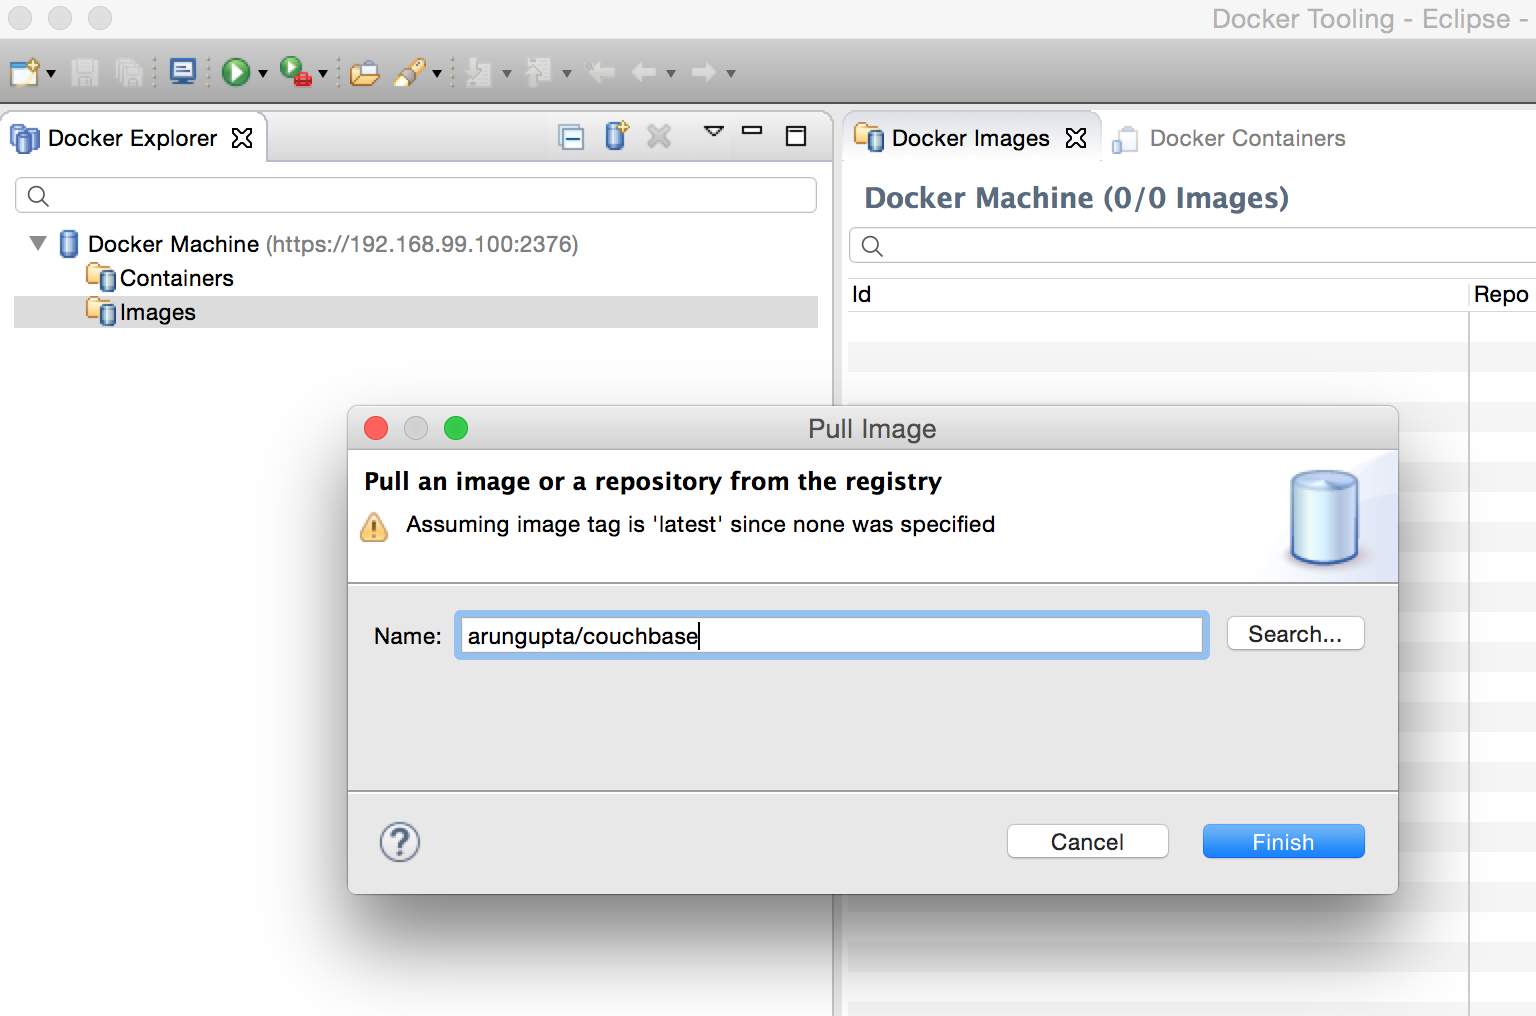
Expand the connection to see “Containers” and “Images”.
Right-click on “Images” and select “Pull...”.
Type the image name and click on “Finish”.
This image is now shown in Explorer and Docker Images tab.
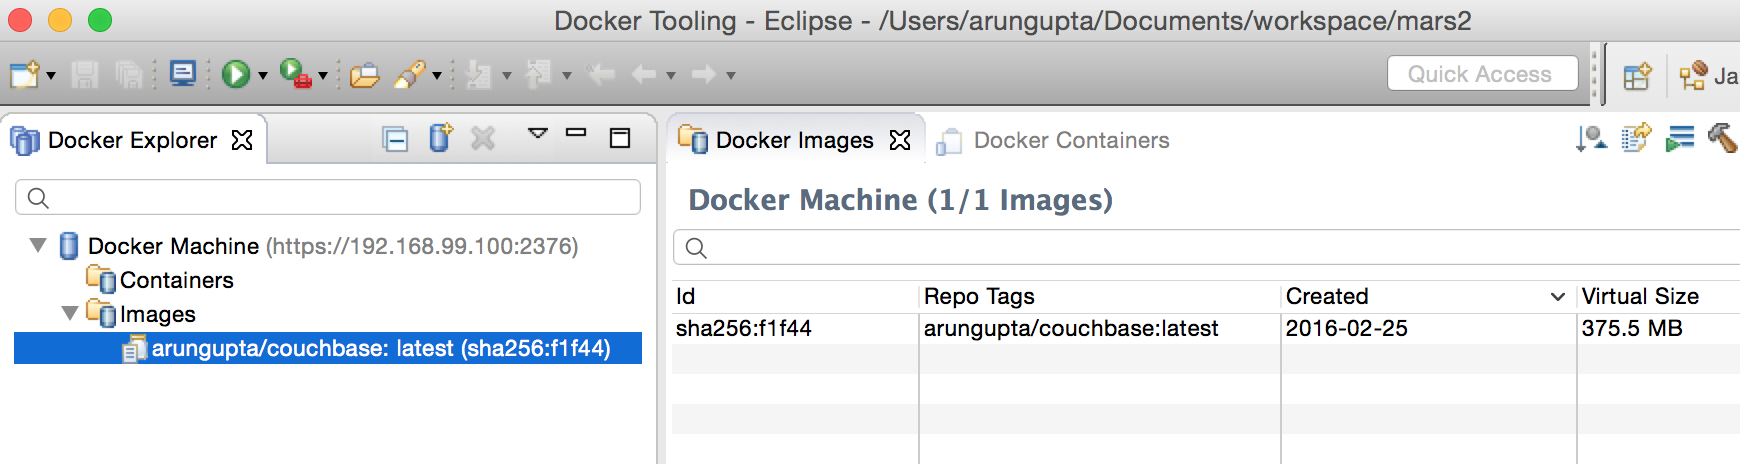
Any existing images on the Docker Host will be shown here.
Run a Container
Select an image, right-click on it, and click on “Run...”. It shows the options that can be configured for running the container. Some of them are:
- Publish ports on Docker host interface (
-Por-pindocker runcommand) - Keep STDIN open and allocate pseudo-TTY (
-iton CLI) - Remove container after it exits (
--rmon CLI) - Volume mapping (
-von CLI) - Environment variables (
-eon CLI)
Uncheck “Publish all exposed ports” box to map to corresponding ports.
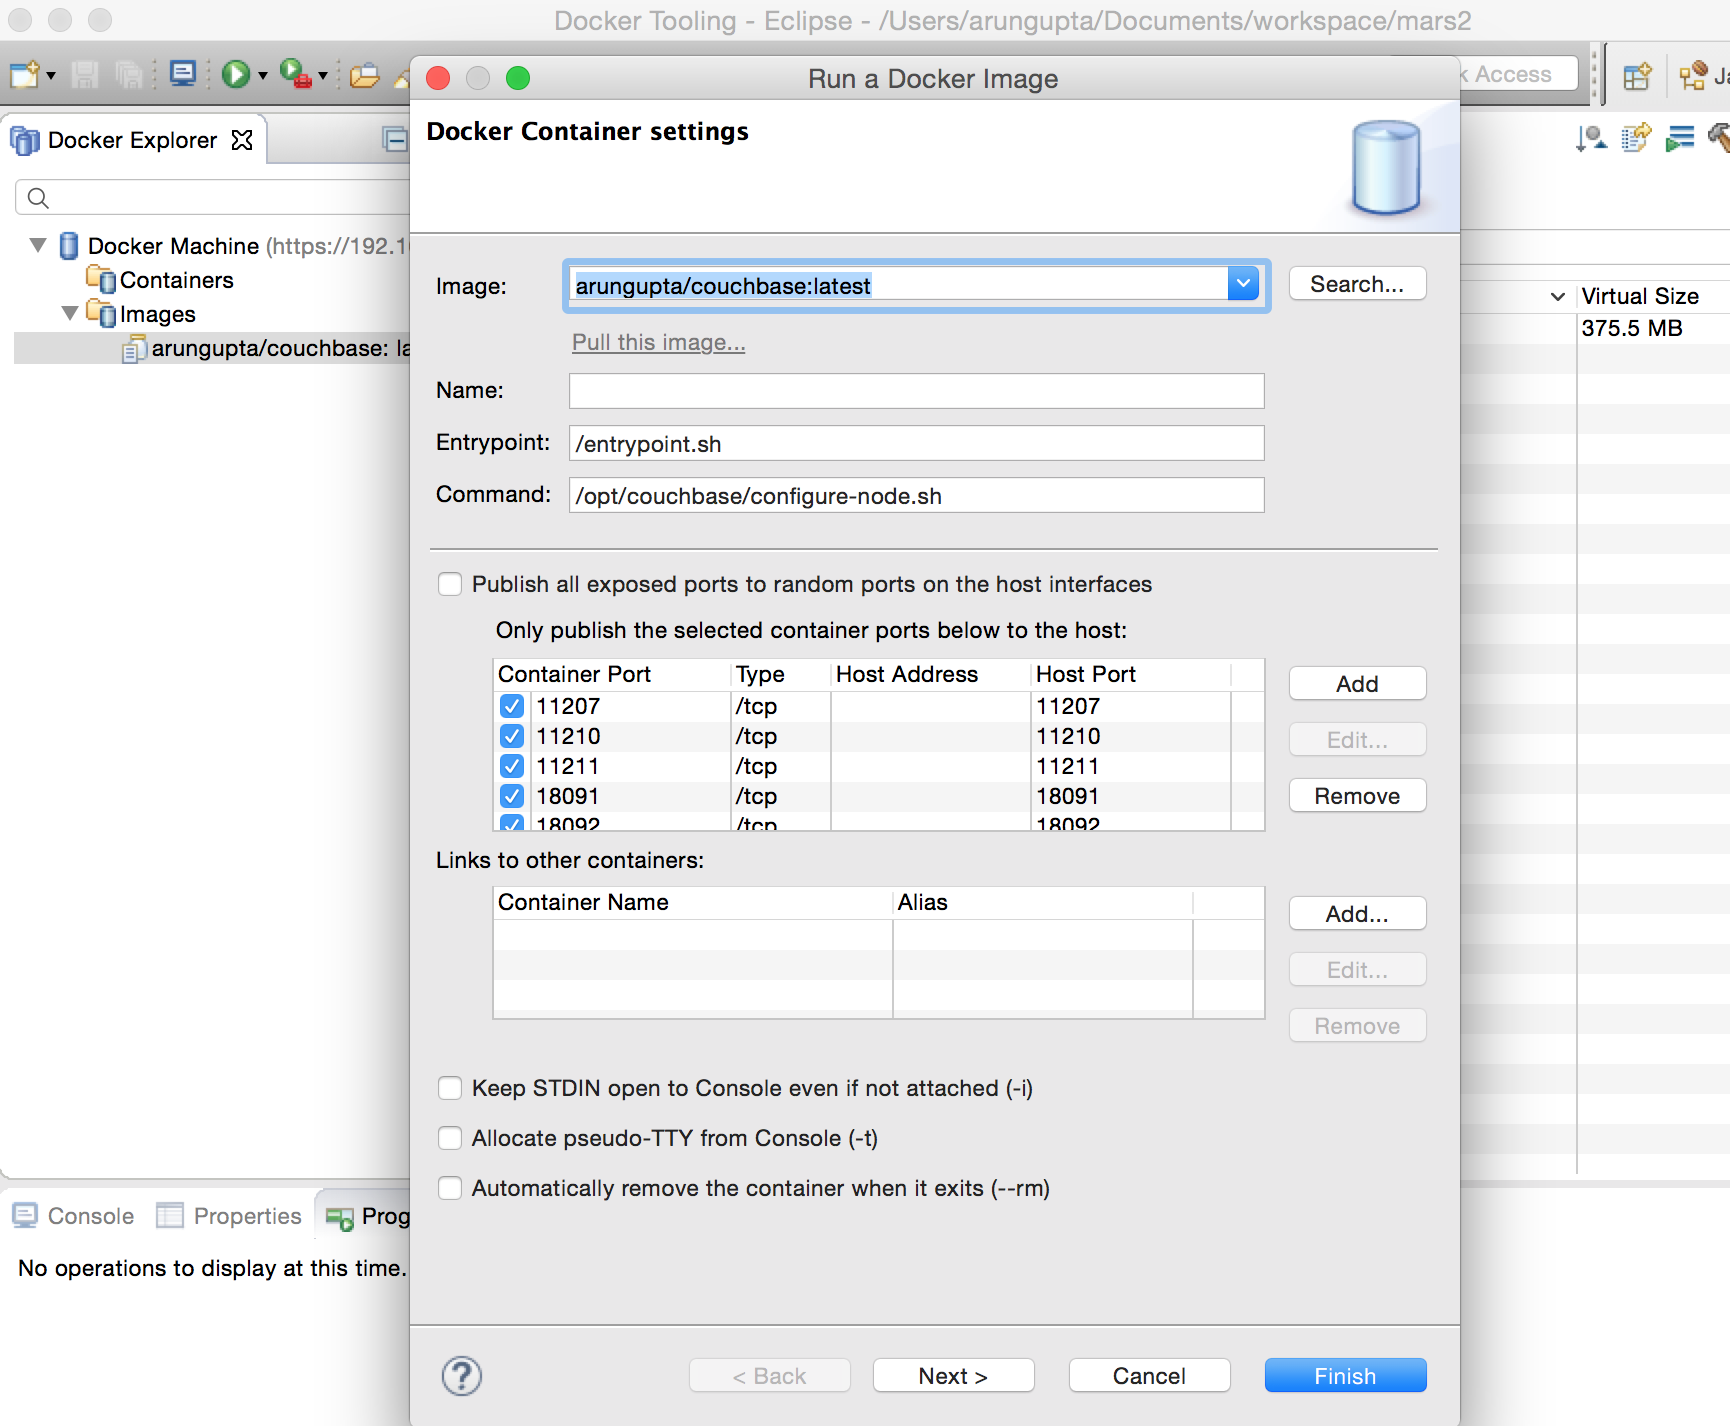
Click on “Finish” to run the container.
Right-click on the started container, select “Display Log” to show the log.
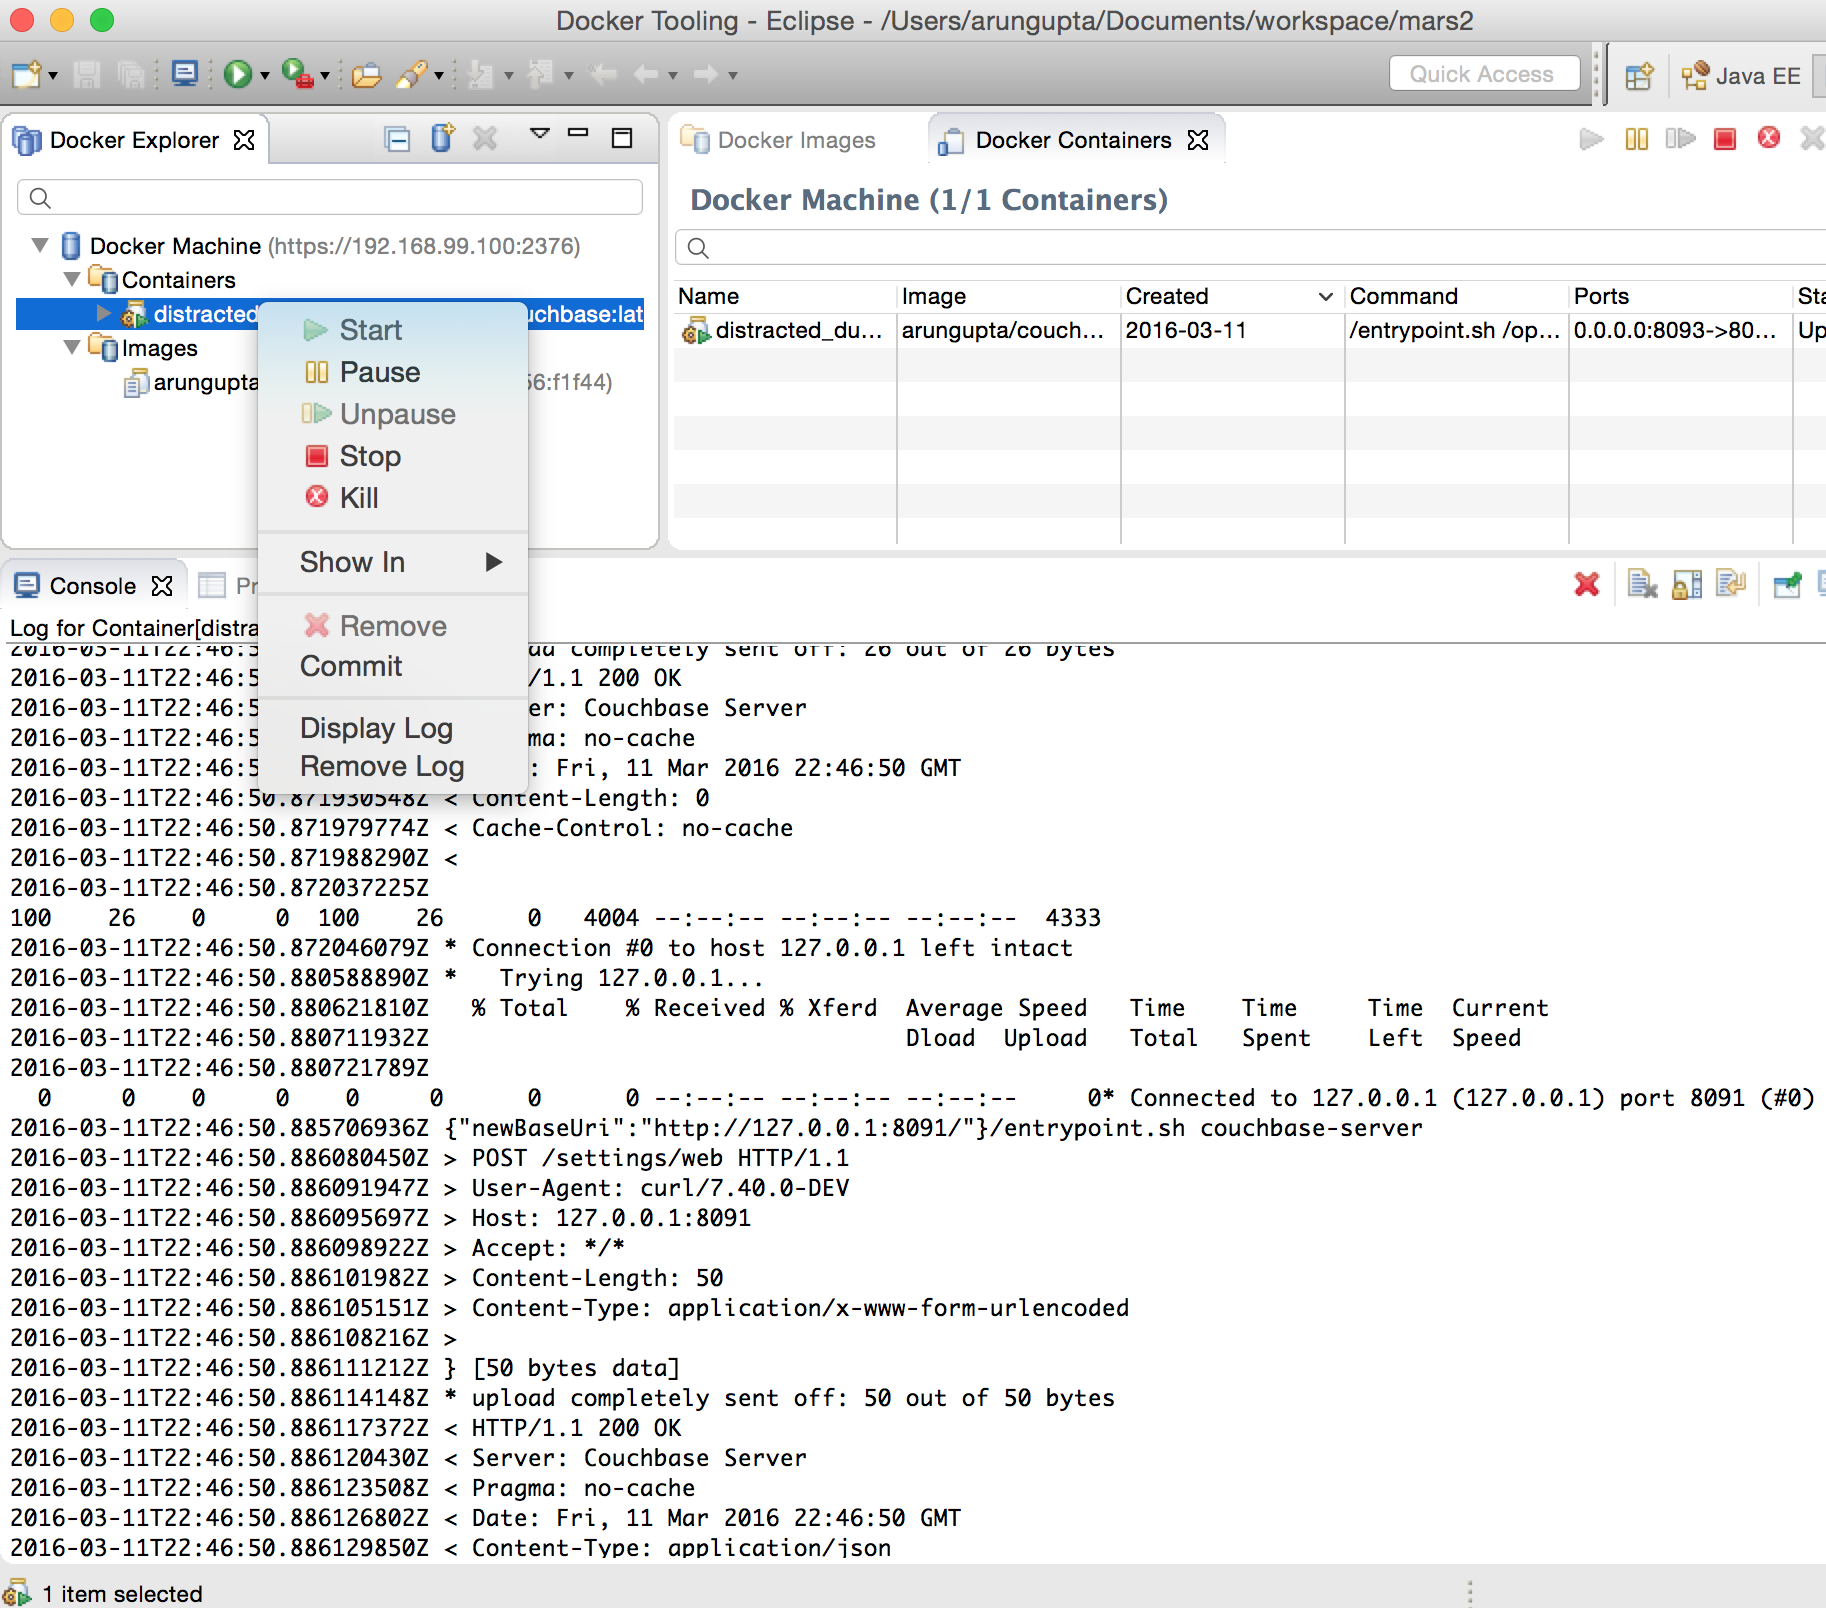
The container can be paused, stopped and killed from here as well.
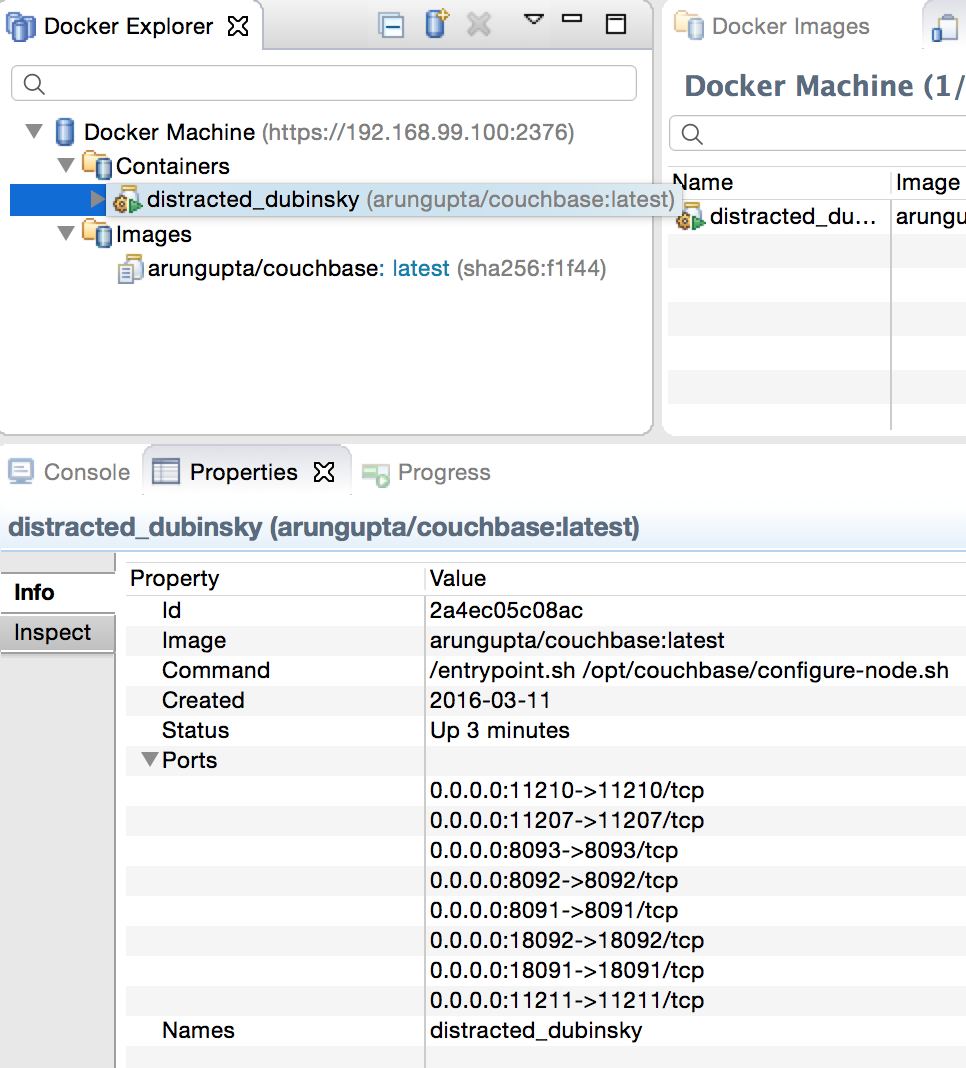
To see more details about the container, right-click on the container, select “Show In”, “Properties”.
Build an Image
In Docker Images tab, click on the hammer icon on top right.
Give the image name, specify an empty directory, click on “Edit Dockerfile” to edit the contents of Dockerfile
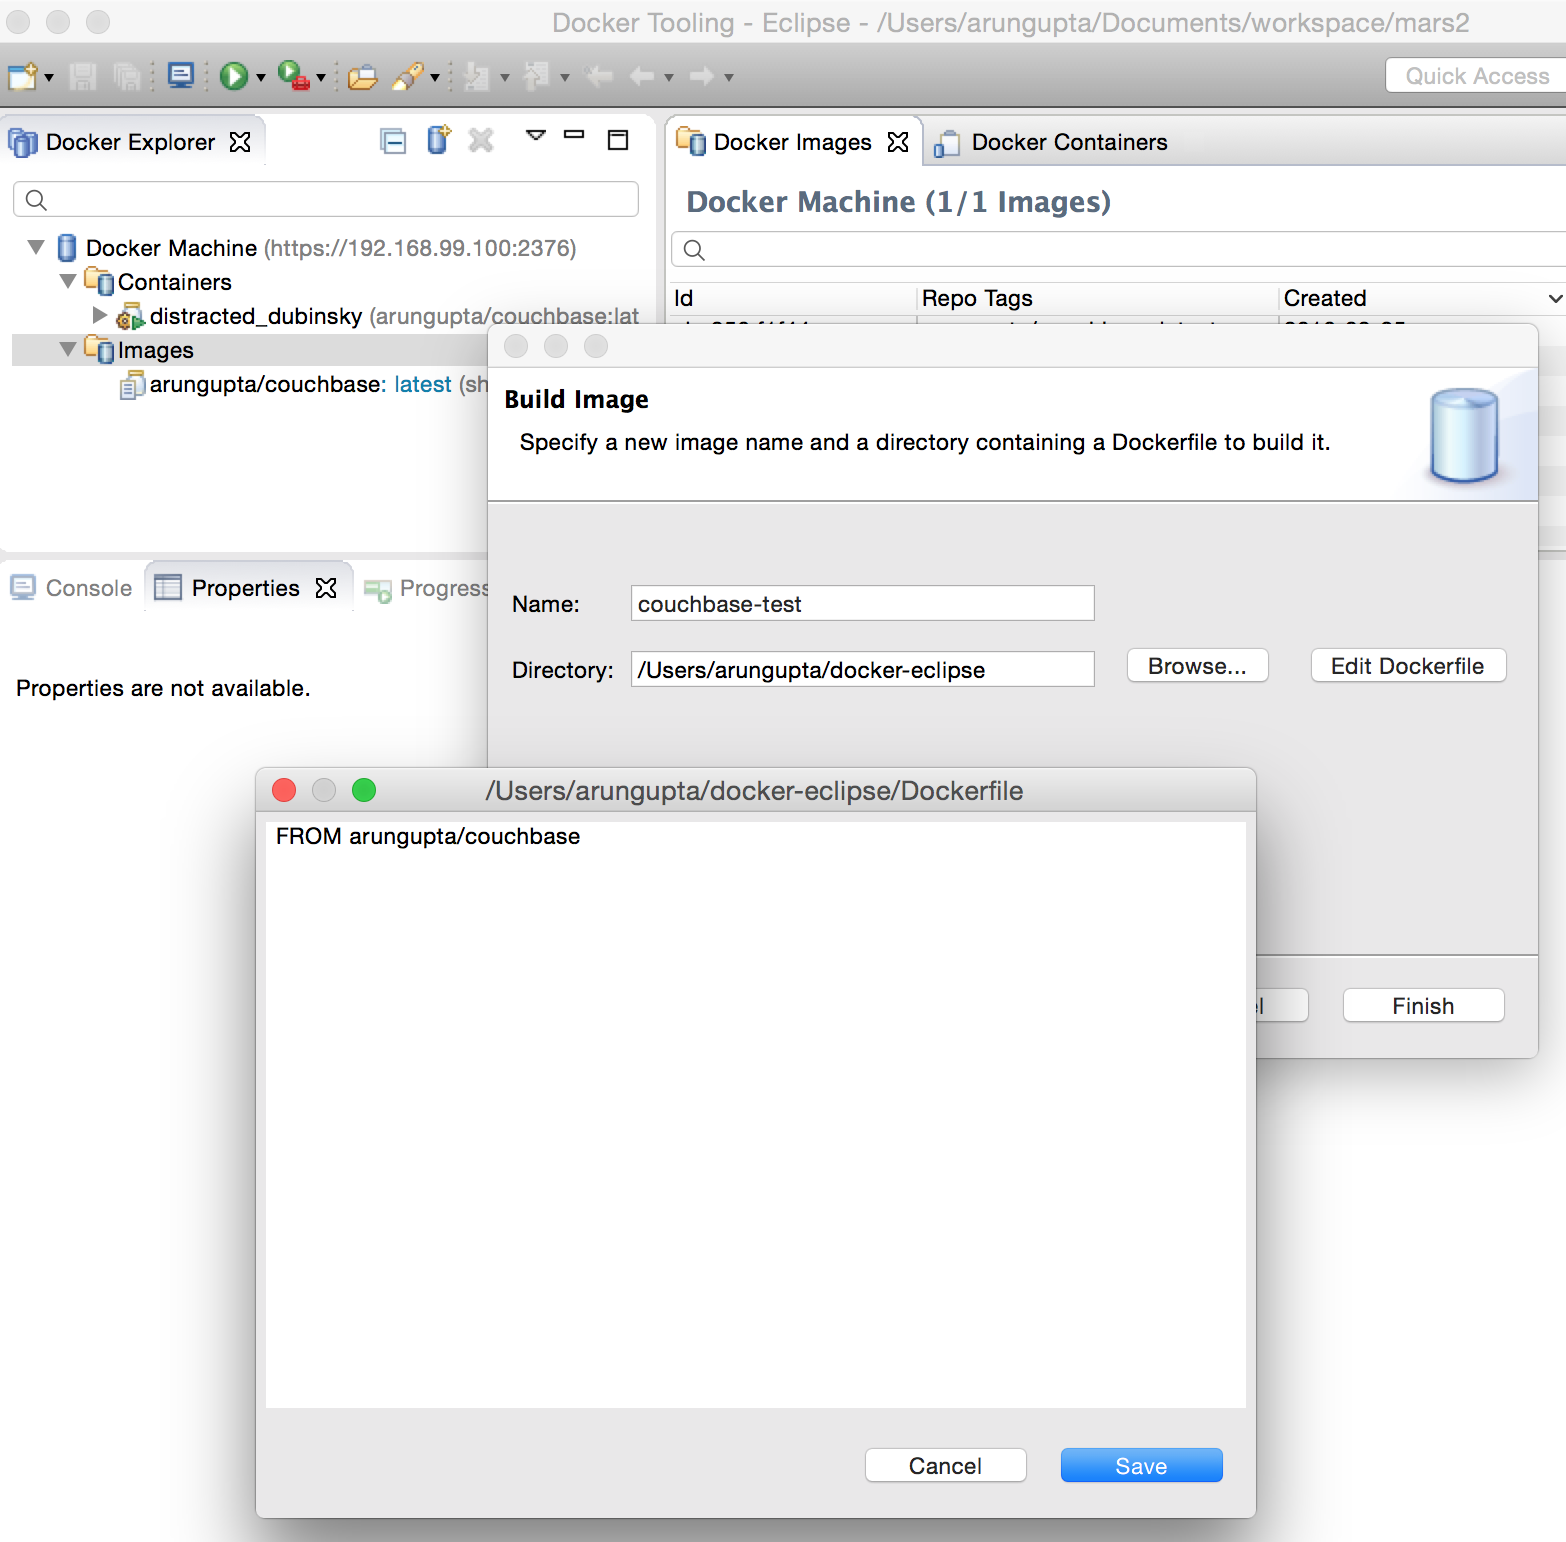
Click on “Save” and “Finish” to create the image.
Feedback
Was this page helpful?
Glad to hear it! Please tell us how we can improve.
Sorry to hear that. Please tell us how we can improve.